 Fence Post Cap Jewelry Boxes

For Christmas this year I wanted to do something special for some family and friends, so I searched the internet and came up with this fun and fairly simple painting project:
Easy-to-Craft Handmade Jewelry Box
For a while now, in the back of my mind, I have really wanted to finish or re-finish some furniture, so I thought this project would be a good excuse to play around with some different distressing and aging techniques so that I would have a better idea of what I was going for.
Paints I used (all spray paints with primer)
Valspar Color Radiance Flat Nautical
Valspar Color Radiance Gloss Flamenco Pink (I think!)
Valspar Perfect Leafy Rise Satin
Valspar Project Perfect Indigo Streamer
These are guesses, as the colors on my computer screen don’t look exactly like the colors I had, but they are close at least.
Things I wish I had done better:
- Sanding – each little fence post cap had an adhesive piece to hold the tag on that was practically impossible to get off. I wish I had tried a little bit harder to completely remove those pieces, since sometimes they weren’t entirely covered up.
- More time between coats on the gloss- the flamenco pink gloss was the bane of my existence, I won’t lie. It stuck to everything, including the cardboard pieces I was spraying these on. I was working to a deadline though, and just wanted them done!
The Finishes!

After I did two coats of the spray paint (inside and out), I lightly sanded each one again, and sanded down to the wood on the corners and where the typical “wear spots” would be. The application process of the stain and the glaze was pretty much the same, paint it on and wipe it off, the stain you can let sit to soak in a bit longer, depending on how dark you want it to be, but the glaze should be wiped off immediately after application. It gets into the grooves and crannies nicely, if you like a gray, weathered look.
With the limewash I didn’t sand down the corners much, just applied it on top of the lightly sanded paint, and let it set for the time outlined on the manufacturer’s instructions, it came out great!
After everything was dried and sanded (again!!) I applied a coat of polyurethane clear satin, which protected the paint job while not making it too shiny, which was not the look I was going for.
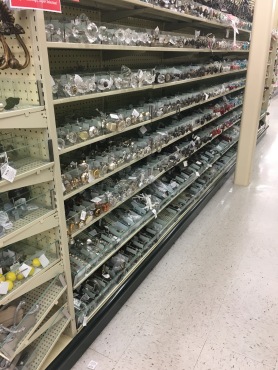
The last step became a little bit of an obsession for me: THE KNOBS!!!
Who knew that there is such a vast universe of knobs and drawer pulls out there just waiting to be explored?! And who also knew how freaking expensive knobs are?! I mean really…
Luckily, Hobby Lobby came through with something special and inexpensive for each person I was gifting these to. I was in heaven, could have stayed there picking out delightful knobs for days. (Insider secret: they are almost always 50% off. In fact, I have never seen them not on sale).
As an afterthought I lined the bottoms with adhesive wallpaper. My plan had been to use scented drawer liner but I couldn’t find any that i loved on short notice, and I think the wallpaper actually turned out better!
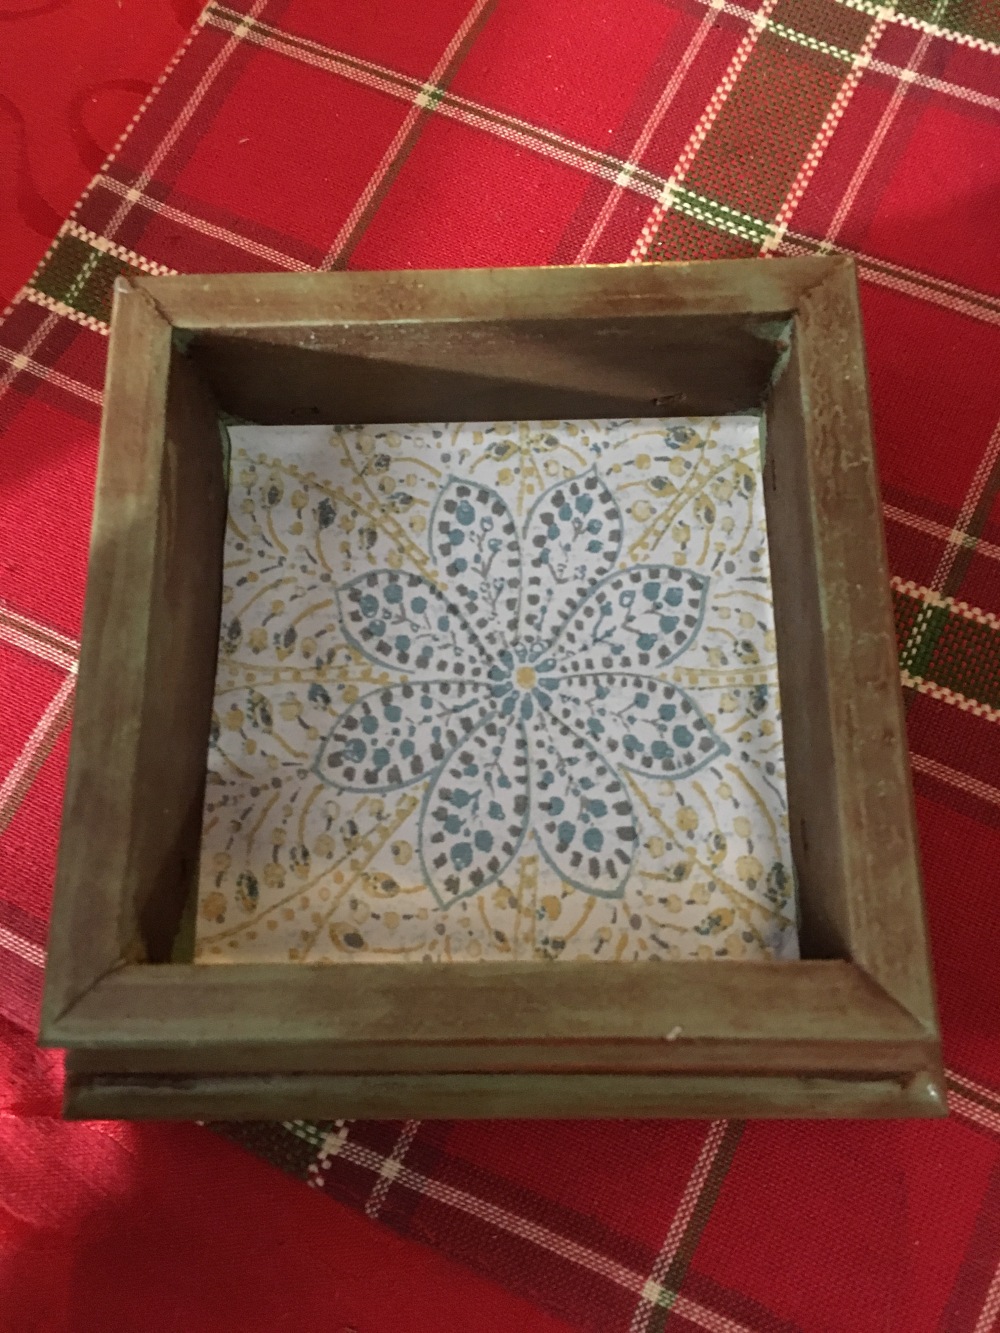
Nuwallpaper™ Gypsy Floral Peel And Stick Wallpaper in Aqua
(I found this at HomeGoods for much less than other places)
I hope you all enjoyed this little project! I will post a gallery of all of the photos shortly, and will link it up here.
Until next time…
Meg

Wow, nice job!
LikeLike